Sunday, December 19, 2010

Vanilla. Roasted. Pears.

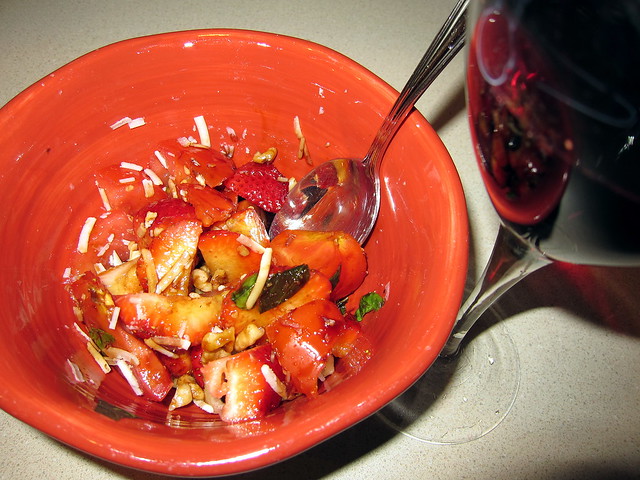
This recipe came from Smitten Kitchen!  I only used one pear and I didn't have any vanilla beans handy so I used bottled vanilla.  I eyeballed her recipe and cut down the amounts, but not very precisely.  Even if you don't like pears, this is sure to please. Drizzle the sauce over whipped cream.

Here is her recipe:

1/4 cup sugar

1/2 vanilla bean
1 1/2 pounds slightly-under-ripe, fragrant, medium pears, peeled if desired, halved though the stem and cored
2 tablespoons lemon juice
2 tablespoons water
2 tablespoon unsalted butter

Preheat oven to 375°F. Place the sugar in a small bowl. With a thin, sharp knife, split the vanilla bean lengthwise in half and scrape out the seeds. Stir the seeds into the sugar.

Arrange the pears in a large baking dish, cut-side up. Drizzle the lemon juice evenly over the fruit, then sprinkle with the sugar. Nestle the vanilla pod among the fruit. Pour the water into the dish. Dot each pear with some butter.

Roast the pears 30 minutes brushing them occasionally with the pan juices. Turn the pears over and continue roasting, basting once or twice, until tender and caramelized, 25 to 30 minutes longer (if the pears are small, test for doneness after 35 or 40 minutes of cooking; a paring knife poked into the thickest part of one should meet with no resistance).


http://smittenkitchen.com/2009/12/vanilla-roasted-pears/

Sunday, December 12, 2010

Failure

To anyone who may be reading...  I am calling defeat for 2010.  Conceding.  Giving it up.

As the name of my blog might hint, I am trying to cook 52 brand new meals in one year.  One year - not every year, just one bloody year.  Is that too hard?  Apparently it is.  I started this little endeavor in 2008 if memory serves, and each year I bump up against 20 and that is it.  This year, I will hit twenty-six.  So I guess that is progress. 

Please don't think that because I cannot do this, that I am a sylph-like rail, or that I have a whirlwind social life.  Neither is the case.  My excuse runs along the lines of "I don't plan very well, and I work just late enough that a grocery store run gets me home too late to actually feel like being creative."  I think planning is the more important part because if I just planned something easy I'd be able to do it.  Or maybe I am just lazy.  That is probably it, actually. 

I started the year so well!  I was just about on track until late April (suspiciously, the season when it's lighter later and things warm up...) and then I fell behind.  And more behind.  And then eye surgery.  Then some travel.  And more travel.  Wah wah wah. 

So here it is, December.  I have to write my Xmas cards, and go shopping, and do all those Xmasy things.  And the page will turn, and it will be January 1, again, and I will try yet again to hit 52.  Lest you think all is lost, there are some positives here.  I eat better than I did 3 years ago - this entire year I have had Kraft Mac and Cheese TWICE only.  Fresher foods, fewer searches for the can opener.  Oh wait, did you think I didn't cook at all?  No no no no no.  I just gravitate to the same things - easy things I've picked up over the past few years...  ah.  Maybe this was worth it after all. 

Here are some photos of what I DID do this year.  Enjoy.

January:  Nags Head


February: SNOW!


March:  Florida with family (parents, brother, niece/nephew)


April:  Meadowlark Gardens


May:  Learning how to sail using the old screwdriver/card/wine glass technique.  First and only lesson!


June:  They call him the Rap, Rap, Rap, Rap, Raptor!


July:  Swiss Bliss (also Italy).  AKA Dad hikes hard-core trails in Switzerland 4 months after a broken hip.  Mom poses at one of her favorite places on earth...


August:  I got a really bad jellyfish sting, and it turned into cellulitis.  It's too gross to show here, so, I will show you a photo of my new shoes instead.


September:  Visitied Mom and Dad over Labor Day weekend.  Kiddos are running across lawn.


October:  Visited Big Sur/Monterey Peninsula, also, hiked Machu Picchu (two photos here).


November:  Vienna


December:  Nothing online yet!  So here is a photo of us toasting Venice.

Monday, October 4, 2010

And tonight's meal is...

Spanish Fried Rice.  This came from All Recipes dot com.

http://allrecipes.com//Recipe/spanish-rice-bake/Detail.aspx

As usual, I varied from the actual recipe.  Here goes:

1 pound lean ground beef
1/2 cup finely chopped onion
1/4 cup chopped green bell pepper (NO BLECH)
1 (14.5 ounce) can canned tomatoes
1 cup water
3/4 cup uncooked long grain rice
1/2 cup chile sauce (I just sprinkled a bunch of chile powder on top)
1 teaspoon salt
1 teaspoon brown sugar (the stuff I had was hard as a brick - no go)
1/2 teaspoon ground cumin
1/2 teaspoon Worcestershire sauce (out of date - tossed)
1 pinch ground black pepper
1/2 cup shredded Cheddar cheese (I have gruyere...)
2 tablespoons chopped fresh cilantro (didn't buy)

Preheat oven to 375 degrees F (190 degrees C).

Brown the ground beef in a large skillet over medium-high heat. Drain excess fat and transfer beef to a large pot over medium low heat.. Stir in the onion, green bell pepper, tomatoes, water, rice, chile sauce, salt, brown sugar, cumin, Worcestershire sauce and ground black pepper.

Let this simmer for about 30 minutes, stirring occasionally, then transport this to a 2-quart casserole dish. Press down firmly and sprinkle with the shredded Cheddar cheese.

Bake at 375 degrees F (190 degrees C) for 10 to 15 minutes, or until cheese is melted and bubbly. Garnish with chopped fresh cilantro.

(NUMBER TWENTY-THREE in 2010)  Yes I realize I am behind.

Sunday, September 26, 2010

French Onion Soup

I last made this well over a year ago.  Fall is coming in, and this is so hearty and so good.  You might need scissors to cut the cheese as you spoon it out, though!

In my blog-goal news:  I am so very far behind I'm worried I may not catch up.  Only three months left in the year and I have three vacations planned before the end of November (short ones, mind you, but even being away for a week takes a toll on meeting the goal).  Out of 52 meals I should have cooked this year, I may only be at about 20 or so.  32 totally new meals have to be cooked in the next three months.  For me, this is a dizzying pace.  Those of you who are chortling as you read this, have a heart please. 

The recipe:
6 large red onions, peeled and thinly sliced.
Olive oil
1/4 teaspoon of sugar
2 cloves garlic, minced
8 cups of beef stock or chicken stock
1/2 cup of dry white wine
1 bay leaf
1/4 teaspoon of dry thyme
Salt and pepper
8 slices of toasted French bread
1 1/2 cups of grated Swiss Gruyere with a little grated Parmesan cheese

In a large saucepan, saut the onions in the olive oil on medium high heat until well browned, but not burned, about 30 minutes. Add the sugar about 10 minutes into the process to help with the carmelization.

Add garlic and saut for 1 minute. Add the stock, wine, bay leaf, and thyme. Cover partially and simmer until the flavors are well blended, about 30 minutes. Season to taste with salt and pepper. Discard the bay leaf.

To serve you can either use individual oven-proof soup bowls or one large casserole dish. Ladle the soup into the bowls or casserole dish. Cover with the toast and sprink with cheese. Put into the broiler for 10 minutes at 350 degrees F, or until the cheese bubbles and is slightly browned. Serve immediately.

Serves 4-6.

Tuesday, September 21, 2010

The "will I ever catch up" posting

I just realized I am making something new tonight.  It doesn't feel new, but I haven't blogged about it yet so it must be new.

This recipe comes from my Savannah cookbook.  One of my many Savannah cookbooks.  It is called Honey Lime Chicken.

You may be surprised to find out that it contains Honey, Lime, and Chicken.  Also soy sauce.  You put all the ingredients into a gallon ziplock baggie and shake it, then refrigerate it for 45 minutes (while you watch the Daily Show that you had Tivo'd the night before) and when it comes out stick the chicken in a cake pan and squirt more honey on top, then stick it in the oven at 425.

Technically I am winging this recipe because it is supposed to be grilled chicken, and, I didn't measure any ingredients out.  I just threw it together.  I'm not even sure how long chicken should bake at 425 so this will be an experiment. 

Happy eating!

(NUMBER TWENTY-TWO in 2010)

Tuesday, August 17, 2010

Peachy Keen

I recently made a blueberry/peach cobbler that is posted on Smitten Kitchen. 

Peach Blueberry Cornmeal Cobbler


For the fruit
1 1/2 (about 4 cups) pounds peaches, pitted and cut into slices*
1 pint (about 2 cups) blueberries, rinsed and dried
2/3 cup packed dark-brown sugar
2 tablespoons flour
2 tablespoons fresh lemon juice
1/4 teaspoon ground cinnamon
1/4 teaspoon salt


For the biscuit topping
3/4 cup (3 1/4 ounces) all-purpose flour
1/4 cup fine stone-ground cornmeal (yellow or white)
3 tablespoons dark brown sugar
1 1/2 teaspoons baking powder
1/4 teaspoon salt
3 tablespoons cold unsalted butter, cut into pieces
1/2 cup buttermilk

Preheat oven to 425°F (218°C).Toss peaches with blueberries, sugar, flour, lemon juice, cinnamon and salt in the bottom of a 2-quart ovenproof dish.

Make the biscuit dough: Stir together the flour, cornmeal, brown sugar, baking powder and salt. Cut the butter into the dry mixture with your fingertips, a fork or a pastry blender. Stir in buttermilk with a rubber spatula until a wet, tacky dough comes together.

Plop spoonfuls of the biscuit dough over the filling; don’t worry about covering entire surface. Bake until the cobbler’s syrup is bubbly and the biscuit tops are browned, about 20 to 25 minutes. Let cool slightly and scoop it into bowls. Top with whipped cream, vanilla ice cream, of if you’re having an accidental run-in with this cobbler before noon, plain yogurt.


http://smittenkitchen.com/2010/07/cornmeal-drop-biscuit-peach-blueberry-cobbler/


(NUMBER TWENTY-ONE in 2010)

Monday, August 16, 2010

Plum Crazy

AKA let's make a tart. 

I found a really interesting recipe in the Washington Post food section last week.  Tomatoes.  Peaches.  Plums.  A farmer's market bounty.  All in a deep dish pie dish.  Off we go!

http://projects.washingtonpost.com/recipes/2010/08/11/tomato-peach-plum-crisp/  From Betsy Garside of Washington.

Ingredients:

1 pound (about 3 medium) ripe tomatoes, cored and cut into thin wedges (about 3 cups)
1 1/2 pounds (2 of each) mixed peaches and red plums, peaches peeled and both fruits thinly sliced (about 3 cups
1/4 cup sugar
1 tablespoon cornstarch
7 tablespoons flour
1/3 cup packed light brown sugar
1/4 teaspoon ground cinnamon
1/4 teaspoon freshly grated nutmeg
1 cup pecan halves
5 tablespoons chilled salted butter, cut into half-inch pieces

Directions:

Preheat the oven to 375 degrees. Have a deep-dish pie plate at hand.

Combine the tomatoes and stone fruit in a large bowl. Add the sugar and cornstarch; toss to coat evenly. Pour the mixture into the pie plate.

Combine the flour, brown sugar, cinnamon, nutmeg and pecans in the bowl of a food processor. Pulse 3 or 4 times, until the nuts are finely chopped. Add the chilled butter, and pulse about 5 times, just until the butter is chopped. (If you start to see clumps, stop. You're headed for cookie dough.)

Spread the topping evenly over the fruit. Transfer the pie plate to a baking sheet wide enough to catch drips.

Bake for 35 to 45 minutes, until the topping is lightly browned and the fruit is bubbling.

Serve warm or at room temperature.


(NUMBER TWENTY in 2010)

Friday, August 13, 2010

Would an Aubergine by any other name taste as sweet?

Eggplant...  aubergine...  melanzane...  I prefer aubergine.  It's a beautiful word and it rolls off the tongue.  Aubergine sounds sophisticated.  Colorful.  Stylish.  The word eggplant is a harsh thud - earthy and farm-fresh - and does not hint of vivid colors. 

This blog post has a dual purpose.  One:  I have conquered yet another recipe.  Two (and I hope will improve my posts from now on):  I have learned a little bit about food styling thanks to an old friend Kavey and a delightful new blog I found through Kavey's site called Culinary Travels, written by Georgina.  You can find Kavey and Georgina's links in my "food and wine porn" link list.


As luck would have it, Kavey's latest blog post was about a seminar she attended on food styling and photography.  Georgina had a similar recent post with detailed tips about food photography as well.  Armed with some ideas, I took some photos this evening with my Canon 30D and 35mm F1.4L lens.  A lens with a max aperture of F1.4 can have some really tight DOF shots which makes for some interesting effects.  You can also hand hold a shot with that size of aperture - no flash!

After all that, I could not decide which shot I preferred to highlight for this post.  I narrowed it down to two shots on different plates.  If you are so inclined, feel free to vote on which you like better.  Muchas Gracias!

PLEASE CLICK ON PHOTOS TO SEE THE WHOLE SHOT.


Here is the recipe I made tonight.  Incredibly easy, delicious, and yes, crispy.  I found it here:

http://www.cooks.com/rec/view/0,1750,144190-254206,00.html

EASY CRISPY EGGPLANT


2 small eggplants  (I only used one)
1/2 c. fine dry bread crumbs
2 eggs
4 tablespoons freshly minced parsley  (omitted)
1/3 c. grated Parmesan cheese
1/2 tsp. dried Italian seasoning (I used a McCormick's spice blend of garlic, onion, and a few other herbs in place of all spices listed here)
1/4 tsp. ea. celery seed, paprika (optional)
1/4 tsp. ea. garlic and onion powder
salt and pepper
3 cloves garlic, whole  (I used the pre-chopped-and-steeping-in-olive-oil garlic in a glass bottle).
3 tablespoons olive oil (you need more than this!)

Wash and slice eggplant and sprinkle generously with salt. Allow to sit out for 30 minutes. Rinse and pat dry.
Set out 2 shallow dishes or trays.

Into the first tray, measure bread crumbs, parsley, celery seed, 1/2 of the cheese, paprika, garlic and onion powder.
In the second tray, beat the 2 eggs well with a fork. Add the chopped parsley and the other half of the cheese.
Heat a pan with 1/4 inch olive oil. Add the garlic in whole pieces; as the oil toasts the garlic, mash it into the oil with the tines of a fork to flavor the oil; remove before browning. Meanwhile, dip the eggplant into the egg mixture, turn to coat both sides; dip and coat both sides in the bread crumb mixtures. Fry in hot olive oil over medium-high heat for 5-10 minutes or until golden on both sides and eggplant is tender in center. If eggplant is later to be baked in a casserole, fry only until edges are browned as cooking will be finished in the oven.

Serve as is, seasoned to taste with salt and pepper, or bake in a casserole dish for 30 minutes at 375°F topped with grated Parmesan, mozzarella and pasta sauce.  (I left out the pasta sauce for this last step).

Here is the other photo:


(NUMBER NINETEEN in 2010)

Sunday, August 1, 2010

Diane's Divine Ginger Cake

I am off to a party.  A big party.  With good friends and lots of food and a pool and everything.  A pig roast (smoked first - and Adam has his own smoker) with all the summer finger-licking sides you can imagine.  Home made Sangria.  Goodies Galore.  It's good to be friends with foodies!  Adam and Colleen's parties are becoming famous - word is getting out.  This time 70 people accepted.  I hope Adam starts his own catering business one day. 

So for this party I'm making a dessert.  There were many good options when I queried my friends about their favorites.  In fact I made one last night (Lime Posset - and you can bet that is going to grace one of my dinner parties this fall - see post below). 

The ginger cake tickled my fancy because of the unique ingredients.  There is even black pepper in the batter and of course fresh chopped ginger.  I think lemon curd would be fabulous on top.  I understand from Diane any fresh fruit with real whipped cream does the trick.

Below is Diane's recipe.  I am waiting for it to come out of the oven as I type.  It will still be warm when I arrive.  Which might mean digging into it sooner rather than later!

* 2 cups all-purpose flour

* 3/4 teaspoon ground cinnamon
* 1/2 teaspoon ground cloves
* 1/2 teaspoon ground black pepper
* 3/4 cup molasses
* 3/4 cup granulated sugar
* 3/4 cup vegetable oil
* 3/4 cup water
* 1 1/2 teaspoons baking soda
* 3 ounces fresh ginger, peeled, grated, and finely chopped (from a 4-inch piece)
* 2 large eggs, at room temperature

INSTRUCTIONS

1. Heat the oven to 350°F and arrange a rack in the middle. Coat a 9-inch round cake pan with butter and flour; set aside.

2. Whisk together flour, cinnamon, cloves, and pepper in a medium bowl to break up any lumps and aerate; set aside. In a large bowl, whisk together molasses, sugar, and oil. (I find it's best to measure in the oil, then use the same measuring cup for the molasses -- it will slide right out because of the slight residue left by the oil)

3. Bring water to a boil in a small saucepan, stir in baking soda, and remove from heat and add ginger, then mix into molasses mixture.

4. Gradually stir dry ingredients into batter. Add eggs and continue mixing until everything is thoroughly combined. Transfer batter to the prepared pan and spread evenly.

5. Bake until a toothpick inserted in the center comes out clean, about 45 to 50 minutes. Remove from the oven and place on a rack to cool for at least 30 minutes before removing the cake from the pan.

Here are some photos.  To see the whole photo, please click on them. 


(NUMBER EIGHTEEN in 2010)

Saturday, July 31, 2010

Lime Posset - and I now own ramekins!

Has it really been 3 months since I last cooked something new?  Or just since I sat my sorry lazy butt down to add to my impoverished food blog?  May 8, and here it's practically August.  Wow. 

May was interesting, to say the least.  We were supposed to leave for Italy and Switzerland on May 21.  Instead, just days beforehand, I was told I was to have emergency eye surgery (Ahmed Valve - implant) and so there went the trip.  We postponed until early July.  Not only was I out of commission for a little while, I wasn't exactly in the mood for being disciplined or creative.  Once I recuperated it was yet again with all the trip preparations for the early July trip.  We spent two delightful (but very hot, in Italy) weeks abroad - and I'm still pining for Switzerland...  Now I'm back and this weekend I'll have two new things. 

Today was a productive day, food wise.  I hit up the famer's market in Leesburg and dropped 85 bucks just like that (50 was on 3 bottles of wine - but still, ouch).  The raspberries are thus very local.  Various baked goods, some more fruit, and heavenly honey-yogurt from a local dairy.  Additionally I later bought ramekins, a spring form round cake pan, and a whisk.  I have never had a whisk nor ramekins before.  I'm moving up in the world. 

Lime Posset isn't exactly a meal?  Well sod it all, I don't care.  It has heavy cream (dairy), it has lime juice and raspberries (fruit).  I would say this dessert is well on its way to covering the food triangle.  The lime juice will prevent scurvy, too, so that's good. 

Many thanks to Mym for introducing this new word to my vocabulary.  I had never heard of this before.  She gave me the recipe but I also found it online and adapted it a little bit because her recipe uses the metric system.

Roughly:

1.5 cups heavy whipping cream
.5 cups sugar
3 T lime juice
Raspberries for garnish.

Bring cream and cup sugar to boil over medium-high heat, stirring until sugar dissolves. Boil 3 minutes, stirring constantly, adjusting heat as needed to prevent mixture from boiling over. Remove from heat. Stir in lime juice and cool 10 minutes. Stir mixture again and divide among four ramekins. Cover and chill possets until set, at least 4 hours or overnight.  Garnish with raspberries.  A sprig of mint is a nice touch as well. 

Verdict:  sinful.  I may have used a little more sugar than is needed so the next time I will be a little less liberal with the sugar. 


Even the ramekins are lime green!


(NUMBER SEVENTEEN in 2010)

Saturday, May 8, 2010

Easy Peasy Carrot Fennel Soup

I did a little bit of searching before I settled on this recipe.  The primary reason for my selection was because once I bought the fennel, I already had all of the other ingredients.  I was inspired to try this interesting combo by an old Books for Cooks recipe (book bought in London, in a little book shop in Notting Hill across the street from the travel book shop in The Movie) and then did some searching on the internet.  During that search I did in fact find another really interesting food blog, "My Man's Belly", which is now in my hall of fame to the right, too.  I plan to try Pamela's soup as well.  As always, if I vary the recipe, I write that far below. 
Ingredients


2 tablespoons unsalted butter
1 medium fennel bulb, trimmed and thinly sliced; fronds reserved
1 1/2 pounds carrots, peeled and thickly sliced
1 large garlic clove, thinly sliced
1 teaspoon salt, or to taste
1/3 cup fresh orange juice
1/4 cup sour cream
Freshly ground black pepper, to taste

Preparation

1.  In a 3-quart heavy saucepan, over medium heat, melt the butter until foamy. Add the fennel slices and cook, stirring, until softened. Add the carrots and garlic and cook another minute. Pour in 6 cups of water and season with salt. Simmer, covered, until the carrots are very tender, about 20 minutes.

2.  Remove the soup from the heat and stir in the orange juice, sour cream and reserved fennel fronds. Use the back of a spoon to mash some of the carrots and fennel, but leave the soup chunky. Season with salt and pepper.

http://events.nytimes.com/recipes/1772/2001/12/09/Carrot-and-Fennel-Soup/recipe.html

My changes:

Less water (4 cups) and in fact I was sorely tempted to use chicken stock but thought I'd give the actual recipe a shot first. 
Pre-cut thinly sliced carrots. 
Pre-minced garlic in a glass bottle (you know the kind).  In fact I also forgot to stir the darn stuff in the fennel/butter mixture which would have been better - I literally added it about 20 minutes into the last stage - the water reduction stage.
TIME:  I bet I had this simmering for an hour and a half.  I think the writer was nuts - 20 minutes would do nothing to those carrots, even the thin ones.  Let it simmer on down!
Probably closer to half a cup of sour cream.

I was skeptical, thinking it would be bland (water?) but it was actually very tasty.  This was even without settling overnight.  I am sure it will be even better tomorrow!

Let me know if you try it, I think you will like it.

(NUMBER SIXTEEN in 2010)

Monday, May 3, 2010

I'm keen for Quinoa


Which must be like saying "I'm Cuckoo for Cocoa Puffs" but in a more mature way.

That is the theory, at least.  It's bubbling downstairs, I'll soon take a bite.  This is a slight break from Five Easy Pieces - to resume later this week.


Here is the recipe:

Baked Quinoa With Spinach and Cheese


By MARTHA ROSE SHULMAN for the NYTimes

1 6-ounce bag baby spinach
2 tablespoons extra virgin olive oil
1 medium onion, chopped
2 plump garlic cloves, minced
4 cups cooked quinoa, (1 cup uncooked)
2 large eggs
3 ounces Gruyère cheese, grated (3/4 cup)
1 1/2 teaspoons chopped fresh sage
1 ounce Parmesan, grated (1/4 cup)

1. Preheat the oven to 400ºF. Oil a 2-quart gratin or baking dish.
2. Heat a medium frying pan or a wide saucepan over medium-high heat. Wash the spinach and without spinning dry, add to the pan and wilt in the liquid left on the leaves after washing. You may have to do this in 2 batches. As soon as the spinach wilts, remove from the heat and rinse with cold water. Squeeze dry and chop. Set aside.
3. Wipe the pan dry and heat 1 tablespoon of the olive oil in it over medium heat. Add the onion and cook, stirring often, until tender, about 5 minutes. Add the garlic and stir with the onion until fragrant, about 1 minute. Stir in the spinach and season with salt and pepper. Remove from the heat.
4. Beat the eggs in a large bowl and add 1/2 teaspoon salt. Stir in the quinoa, the onion and spinach mixture, the Gruyère, and the sage. Add freshly ground pepper and stir the mixture together. Scrape into the gratin dish. Sprinkle the Parmesan over the top and drizzle on the remaining tablespoon of olive oil. Place in the oven and bake until nicely browned on top, about 25 minutes. Remove from the heat, allow to sit for about 5 minutes, and serve.

Advance preparation: The cooked quinoa will keep for 3 or 4 days in the refrigerator. The recipe can be made through Step 3 several hours or even a day ahead. The gratin can be assembled several hours ahead.


The verdict?  On paper, it looks like it should be amazing.  It's not bad, but something is missing.  It's a little bland.  Maybe the spinach makes it taste too healthy (or the quinoa). 

The recipe called for salt and I didn't use it (I figured I could do that afterwards if I wanted it) and perhaps cooking with salt (instead of sprinkling it on after) is important... also, I forgot until the last second that I needed to rinse the quinoa and I don't think I managed to strain it adequately afterwards and as a result I think there was too much water - I may have overcooked it a little. I ended up straining the result! I know you are supposed to cook it until it's fluffy like rice. Next time I am buying a sieve - colanders have big holes.

It wasn't bad, it just wasn't what I expected. I already doled out my portion for lunch so we'll see if settling overnight helped to set the flavors in.  Also, I work with a number of Peruvians, I'll inquire with the experts.

Next day:  leftovers were much, much better.


(NUMBER FIFTEEN in 2010)

Sunday, May 2, 2010

Five Easy Pieces IV

This was definitely easy, but, my verdict:  don't bother.  Also a Mark Bittman recipe from the NYTimes. 

As Louis XVI would say on July 14, 1789:  Rien.

17. With thanks to Szechuan Gourmet restaurant: Finely chop celery and mix with a roughly equal amount of pressed or smoked tofu, chopped. Dress with peanut oil warmed with chili flakes and Sichuan peppercorns, then mixed with soy sauce.

Now I have a whole lot of leftover tofu and no where to go.

(NUMBER FOURTEEN in 2010)

Tuesday, April 27, 2010

Five Easy Pieces III

OK, OK, perhaps I am cheating a little bit tonight.  This was more of a side dish to accompany Paula Deen's Mashed Potatoes (PDMP) which I now know how to make by heart.  It's a dinner of side dishes and I'm going to top it off with a bowl of dark chocolate ice cream. 

This again was from the NYTimes Mark Bittman.  His recipe for this "salad" is below - and he is quite correct, it's an absolutely incredible combination.  I'm hooked.

15. Cut cherry or grape tomatoes in half; toss with soy sauce, a bit of dark sesame oil and basil or cilantro. I love this — the tomato juice-soy thing is incredible.

The link:

http://www.nytimes.com/2009/07/22/dining/22mlist.html?_r=1

The back link to PDMP:

http://52mealsinoneyear.blogspot.com/2008/11/paula-deens-mashed-potatoes.html

(NUMBER THIRTEEN in 2010)

Sunday, April 25, 2010

Five Easy Pieces II

Part two of Five Easy Pieces - but can I keep up the pace until I am through?  It's easy on the weekends, and especially when I've got kitty-watch detail both days (I took them in to the vet for their annual vaccinations which means staying home to watch them for a few hours afterwards - one at a time).

Today for lunch was another easy-peasy "salad".  Also taken from the NYTimes Minimalist Mark Bittman, this recipe is a peanut sauce intended to be tossed with cold noodles.  Here are most of the assembled ingredients:


Here is the recipe:

87. Cold not-sesame noodles: Combine about a half-cup peanut butter with a tablespoon soy sauce and enough coconut milk to make the mixture creamy (about a half cup), along with garlic and chili flakes in a blender or food processor. Toss sauce with cooked and cooled noodles, a load of mint, Thai basil, and/or cilantro, and lime juice. Shredded cucumber and carrots optional.

I used chili oil from the Asian food aisle as I could not find chili flakes anywhere.  Trust me, this oil will get the point across.  I wish I had bought carrots.  I've got cilantro for the topping.

The verdict:  VERY creamy sauce.  The coconut milk really helps to un-stick the peanut butter.  That said, the peanut butter was still clearly very dominant even with the other strong ingredients.  I think it could use a tad more chili oil and soy sauce.  The cilantro was a nice touch.  I have enough leftovers for at least 3 other meals I would say.

Here are photos of my kitties who keep me on the straight and narrow:


(NUMBER TWELVE in 2010)

Saturday, April 24, 2010

Five Easy Pieces I

A few weeks ago I realized I was 5 recipes behind.  I thought "The title sure fits; I'll find 5 easy meals and I'll be caught up."

That was a few weeks ago.

Regardless, I will make five really easy new things in succession to get myself back on track with a few weeks ago, at least.  I'm shameless.

Here is today's first recipe taken from the NY Times "The Minimalist" recipes.  The author had 101 salad recipes.  Can you see where this is heading...?  As a bonus, I've included some before and after photos.

13. A red salad: Combine tomato wedges with halved strawberries, basil leaves, shaved Parmesan and balsamic vinegar.

That's so easy, even I can do that!

I added a handful of walnuts and used very aged balsamic vinegar (brought home from Italy a few years ago). 


It was really, really fresh and the aged BV had a nice bite to it.  I forgot how much I like basil. 

I am starting to enjoy this process and even more so when I make easy things like the above and realize I have yet another go-to meal.  Less aimless wandering around Wegmans - now I know I can toss strawberries and tomatoes - who knew.  Today's Wegmans visit had a purpose, I had at least 4 different recipes for which to purchase and it was very gratifying to see how full my cart was of simple, fresh ingredients, most of which were from the produce section.  No potato chips.  No junk food (I do not consider Triscuits to be junk food because there is no HFCS in them!).  No chocolate, although when I reached the spice counter I was fascinated by a "new spice" jarred and labeled "cocoa with chile powder".  Ok, ok, I'll pick that up, you never know what I could use it for... 

Yum.


(NUMBER ELEVEN in 2010)

Monday, April 5, 2010

Southern Comfort Food

I'm falling behind in my quest!  I was on an (almost) once a week pace until the weather got nicer.  This recipe was made on Saturday and I am only now blogging it Monday.  I made Chicken and Macaroni Bake.  Very rich and filling.

Ingredients:

•8 ounces elbow macaroni or small shells (I used egg noodles)
•salt
•3 tablespoons butter (I used 4)
•3 tablespoons flour
•1 cup chicken broth (I used almost a whole can, oops)
•1/2 cup heavy cream
•3 to 4 ounces smoked gouda cheese, shredded or cut in small pieces
•pepper, to taste
•1 teaspoon fresh parsley, optional (didn't use)
•1 1/2 to 2 cups cubed cooked chicken
•1 1/2 cups frozen peas and carrots, thawed (I used sliced fresh mushrooms instead)
•1/2 cup soft bread crumbs
•1 to 2 teaspoons butter, melted

Preparation:

Cook macaroni in boiling salted water as package directs. Drain and set aside.

In a saucepan over medium low heat, melt butter; add flour. Cook, stirring, until flour mixture is well blended and bubbly. Gradually stir in chicken broth and cream. Stir in cheese until melted and smooth. Add pepper, to taste, along with parsley, if using. Cook, stirring, until thickened. Add the chicken and vegetables; cook for about 1 minute longer.

Combine the sauce with cooked and drained macaroni; pour into a 2-quart casserole. Toss bread crumbs with melted butter and sprinkle over the casserole. Bake at 350° for about 25 minutes, until bubbly and browned.

Serves 4 to 6.


http://southernfood.about.com/od/chickencasseroles/r/bl60414a.htm

(NUMBER TEN in 2010)

Tuesday, March 16, 2010

Goldilocks tries to cook Pasta con Burro e Salvia

Tonight is my second attempt.  Do you know what it's like to crave a certain meal, only to try your hand at it not once but twice and then forget what it should actually taste like?  It's quite frustrating.  I might have to seek out a real Italian restaurant soon to regain the taste of it before trying again. 

First time:  the pasta was overpowering.  Too much soft-mouth-feel, not enough sage.  This was despite the fact that I used ALL the sage I bought.  All of it.  More than 30 leaves I bet.  It wasn't quite fresh pasta, but it was "special pasta" - gourmet fettucine which really was just too overpowering for the dish.  Beware the pasta which can cook in just three minutes.  Clearly fresh is better, so perhaps I didn't use enough sage or brown it enough.  This was late last week. 

Second time (tonight):  Wegmans was out of fresh sage (the idea!) so I bought powdered sage.  The pasta (regular ziti) was fine but the sage flavor itself left much to be desired.  Not to mention I probably did not brown the butter quite enough. 

Will the third time be Just Right?  There has to be a third time you know.

Here is the recipe below.  I took cues from two websites.  One was the NYTimes which I followed more closely.

http://bitten.blogs.nytimes.com/2008/05/13/recipe-of-the-day-pasta-with-butter-sage-and-parmesan/

http://www.aproposofnothing.net/food/archives/000111.php

Ingredients


Salt and freshly ground black pepper
1 pound cut pasta, like ziti
2 tablespoons butter
30 fresh sage leaves
1 cup or more freshly grated Parmigiano-Reggiano

Method

1. Bring a large pot of water to a boil; salt it. Cook pasta until it is tender, but not quite done.

2. Meanwhile, place butter in a skillet or saucepan large enough to hold the cooked pasta; turn heat to medium, and add sage. Cook until butter turns nut-brown and sage shrivels, then turn heat to a minimum.

3. When the pasta is just about done, scoop out a cup of the cooking water. Drain the pasta. Immediately add it to the butter-sage mixture, and raise heat to medium. Add 3/4 cup of the water, and stir; the mixture will be loose and a little soupy. Cook for about 30 seconds, or until some of the water is absorbed and the pasta is perfectly done.

4. Stir in cheese; the sauce will become creamy. Thin it with a little more water if necessary. Season liberally with pepper and salt to taste, and serve immediately, passing more cheese at the table if you like.

(NUMBER NINE in 2010)

Sunday, February 28, 2010

Ghosts of rice past...

Do your pots have the ghosts of rice in them?  By this I mean the result of setting the rice on simmer and then forgetting to set the timer.  When you wander back just a leeeeeetle too late you find a sticky mess in the pan which is not only inedible (unless you like truly sticky rice) but it's also a scrub job.  I've done this a few times (by few I mean "more than five but less than ten, I think") and my Calphalon pans now have little outlines of rice grains on the bottom.  (NB:  this isn't crusted food, it's literally an outline of the grains...)

At any rate, the intrepid chef wannabee made another rice dish this evening.  Along with it I had SNOMG II, based on my hamburger creation mentioned below.  No snow in the forecast this time, and, the main changes I made to the hamburger were advanced spices and instead of one cup of water I used one cup of white wine (White Bordeaux as a matter of fact). 

Here is the rice dish I had alongside it.  It is called Orange Cilantro Rice.

Ingredients

2 teaspoons butter (I used EVOO)
1/2 cup diced onion
1 cup uncooked long grain white rice
2 teaspoons ground cumin
1/2 teaspoon garlic powder (I used the chopped garlic you find in little bottles)
1/2 teaspoon onion powder (after all that onion, why more?)
1/4 teaspoon ground black pepper
1/8 teaspoon cayenne pepper (optional)
salt to taste
1 1/2 cups orange juice
1/2 cup chicken broth
1/2 cup chopped fresh cilantro

Directions
Melt the butter in a saucepan over medium-high heat. Stir in onion, and cook until tender. Mix in rice, and season with cumin, garlic powder, onion powder, pepper, cayenne pepper, and salt. Cook and stir until rice is golden brown. Pour in orange juice and broth, and bring to a boil. Reduce heat to low, cover and simmer 20 minutes.

Remove cooked rice from heat, and gently mix in cilantro to serve.

http://allrecipes.com/Recipe/Orange-Cilantro-Rice/Detail.aspx

(NUMBER EIGHT in 2010)

Tuesday, February 23, 2010

Rustic Apple Tart

Two new recipes in one week. Will I hit 52 new meals this year?  It will only be my third attempt, after all.

Last night I bought the ingredients for the below.  The Waldorf Salad (that I did not know I was making until later) was such a hit I decided to look for more apple and walnut recipes.  I found this one (link and recipe from the site, below).

Tonight, I made it.  I didn't root around looking for thyme, that may have made a little difference.  I also cheated and used refrigerated pie crust. 

Ingredients

1 Pâte Brisée (tart dough) for a 10-inch tart (see all butter crust recipe) or 1 packaged, flat pie crust
1/2 cup walnuts, chopped
1/4 cup crumbled gorgonzola cheese (or blue cheese)
1 tablespoon fresh thyme, chopped, or 1/2 teaspoon dried
2 Tbsp maple syrup
2 large granny smith apples (or other good cooking apples such as jonagold or fuji), peeled, cored, chopped
1 teaspoon of lemon juice (optional)

Method

Toss the walnuts, gorgonzola, thyme, chopped apples, and maple syrup together in a medium size bowl. As you are working with the apples (chopping them, mixing them in with the other ingredients), if you want, you can squeeze a little lemon juice on them to help keep them from discoloring. Cover the mixture with plastic wrap while you prepare the crust.

Preheat oven to 350°F. Roll out pastry dough to 13-inches, at an 1/8 of an inch thickness. Place pastry dough on a rimmed baking sheet. (Rimmed because the pastry will leak butter during the cooking process.) Mound the filling in the middle of the rolled out dough, and spread out evenly to 1 1/2 inches to 2 inches from the edge of the dough. Pleat the edges of the dough over the filling.

Bake for 45 minutes to an hour, until crust is nicely browned. If at any time it looks like the walnuts are getting a little burnt, you can lightly tent a piece of aluminum foil over the center.

http://simplyrecipes.com/recipes/apple_walnut_gorgonzola_rustic_tart/

(NUMBER SEVEN in 2010)

Sunday, February 21, 2010

Talking to strangers...

See what it gets you - a good healthy recipe!

[Edit - apparently the below is a modified Waldorf Salad recipe.  Oops - here I thought it was so clever]

A week or so ago I happened to stand in line at Wegmans near a jolly couple.  They were obviously the kind of shoppers and cooks who paid attention to the ingredients they bought and were healthy eaters.  The conversation started when she was unloading her cart and told me some tips on cooking with less salt. 

It quickly segued into a recipe for a meal that she found in weight watchers which I believe may actually be vegan.  She recited it to me and lo and behold, I remembered it.  I made it today, finally.  It's actually quite good!

1 fuji apple
1 granny smith apple
1/2 c chopped red onion (I probably had more)
A few handfuls of cranberries - I bought dried raisin/cranberry mixed together.
A cup of chopped celery - again, that may have been a little more than the recipe but it was fine.

Mix the above, and toss with just a touch of mayo and then sprinkle lemon juice on top and toss some more.  The mayo in my fridge was about 10 months expired (oops) so no mayo for this chica.  I did use lemon juice though.

Finally, just before you dig in, sprinkle walnuts on top.  THIS is key - they definitely added to the taste.

This turned out very well!  I would not call it dinner per se, but, a good snack. It was a very late lunch (just finished it) so dinner may be take out, after all that.  But this was goooooood.

So you see, talking to strangers can be a good thing.

ps.  you want to be sure you have the right mix of onion and in fact I'd probably scale back on the onion.  Either make sure it's exactly 1/2 c or even less.  I had a second helping and this scoop had a lot more onion.  Almost took my breath away.

(NUMBER SIX in 2010)

Thursday, February 11, 2010

Chili for a chilly day

Yesterday was the SECOND Storm of the Century this winter.  How much more can metro DC take?  We actually have yet another snow forecast for early next week although currently that doesn't look like a blizzard, just a few inches.

I haven't had chili in ages and this recipe below looked interesting.  I thought I'd give it a try.  As usual, what is at the top is taken directly from the recipe, and below is where I describe my deviations. 

Ingredients

1 tablespoon vegetable oil
1/2 cup chopped onion
2 pounds ground beef
1/4 cup chili powder
1 teaspoon ground cinnamon
1 teaspoon ground cumin
1/4 teaspoon ground allspice
1/4 teaspoon ground cloves
1 bay leaf
1/2 (1 ounce) square unsweetened chocolate
2 (10.5 ounce) cans beef broth
1 (15 ounce) can tomato sauce
2 tablespoons cider vinegar
1/4 teaspoon ground cayenne pepper
1/4 cup shredded Cheddar cheese

Directions
Heat oil in a large saucepan over medium heat. Add onion and cook, stirring frequently, until tender, about 6 minutes.

Add beef, in batches if necessary, and cook, breaking up with a wooden spoon, until browned.

Add chili powder, cinnamon, cumin, allspice, cloves, bay leaf, chocolate, beef broth, tomato sauce, cider vinegar, and red pepper. Stir to mix well. Bring to a boil. Reduce heat to low; cover and simmer 1 1/2 hours, stirring occasionally.

It is the best if you now refrigerate overnight.

Remove the bay leaf. Reheat gently over medium heat. Serve over hot, drained spaghetti. Top with shredded cheddar cheese.

What I actually did:

First, I used the entire onion and it wasn't a small one.  You can't have enough onion, right?
Second, I realized too late that I only had one pound of hamburger.  Ooops.
I used EVOO.
Because I didn't have enough burger, I went a little easy on the chili powder but more or less used the full amount of the other spices.  Perhaps I should have gone for broke.
No cloves
No bay leaf
No beef broth.  I was going to pour in a cup of white wine but the bottle I grabbed was corked and the other bottles were good wine and I didn't want to waste it on chili.
I used about 3 small squares of chocolate.  It was more than an ounce but I wouldn't say it was three ounces.
The overnight refrigeration occurred with the leftovers.

Consensus?  It seemed more like I was making spaghetti sauce than chili, really.  The taste is unique and perhaps a bit rich.  I'm going to see how the overnight settling changed things.  I'm betting the beef broth and a full 2 pounds of meat would have really helped.  A very concentrated flavor and believe it or not I would not say the onions ruled even though there was an entire onion and not just half a cup chopped.

(NUMBER FIVE in 2010)

Saturday, February 6, 2010

SNOMG! Hamburger and rice? Nothing else in that pantry?

I did go grocery shopping before the Snow of the Decade, but I didn't do it with menu in mind nor grocery list in hand. 

However, what I did make actually tasted pretty good even if it's simple and boring. 

I made jasmine rice using chicken broth, for starters.

The two pounds of hamburger was unloaded into my large skillet which already had a good dose of EVOO heating up nicely inside.  After I put the chunk in the skillet, I coated it with cinnamon, a few dashes of allspice, and a couple of quick flicks of cayenne pepper.  Not too much.  I broke up the meat which was simmering away nicely and then poured a cup of water on top and put the lid on it.  Heat on medium and I let 'er rip for about 30 minutes. 

It was actually a delicious, flavorful meal.  I like it. 

Dessert:  I opened a bag of frozen peaches into a large bowl, earlier in the afternoon, and sprinkled cinnamon all over the peaches.  I later sprinkled sugar on top which gets a nice juice going.  They were still quite cold by the time I ate them but the juice was very cinnamon-ey.

Oh yeah, before the peaches were thawed I had some more Belgian Chocolates and Bordeaux wine (St. Emilion). 

Tomorrow I'm going to make a recipe that was quoted to me while standing in line at Wegmans.

(NUMBER FOUR in 2010)

Sunday, January 24, 2010

I blame it on Gordon. Ramsay, that is.

Sometimes, you have to remind yourself why some foods are not to your liking...

And so I bought a half pound of very fresh (squeaking fresh) scallops. 

Why did I do this, I wonder.  It's been years since I had scallops - and I do mean years.  I may not have been living in Virginia, as a matter of fact - it was that long ago.  I'm just not a fishy-fishy-fish person. 

I believe it was because I saw one Gordon Ramsay program which showcased him teaching a protege how to make scallops in his restaurant.  I was fascinated.  He held up the plate of scallops and sprinkled some kind of fairy dust on it from arms-length.  So artful!  Let me describe:  he held the plate in one hand, and a handful of magic in the other hand.  Whiff whiff whiff, hand held almost to his shoulder height,  with deft flicks of the wrist he lightly coated the scallops and then set about pan searing them.  He is such a perfectionist he actually threw out a few servings before producing one for the clientele.  Not because they would have tasted bad, but because the presentation was imperfect.  So in the garbage they went and he made his protege start from scratch.

I'm so impressionable.  The image stayed with me and I finally took the plunge and bought some fresh scallops.  Here is what I did:

Half pound of scallops.
2-3 T EVOO.
A heaping T of minced garlic in oil.  You can find small bottles of this in the produce section.

I put several T of pan searing flour into a baggie and shook the scallops in the sealed bag.  OK, OK, Gordon Ramsay I am not.  I have to walk before I can run, people!

The heat should be on medium-high and you want the oil to be nice and hot in the skillet. I ladled on the garlic and spread it around while the oil heated up. 

I artfully arranged the pieces in the skillet and watched over them.  After they started looking a little brown I flipped them and watched again.  When they were done I turned off the heat and put 'em on a plate and squirted a little lemon juice on them.

Sigh.  They looked perfectly scrumptious.  While I certainly wouldn't say they tasted disgusting I just don't care for the taste that much.  They were of a perfect texture and melted in my mouth.  I just am not a fan.

Maybe I should try a different recipe?  File this under "a great idea, too bad about the fish".

(NUMBER THREE in 2010)

Pan seared Cod

Well this was a fiasco!  It tasted great but what a mess of the presentation.

I always bake my cod.  This was so fresh though - literally caught on Friday and flown overnight to Wegmans.  I watched the fishmonger chop it up in front of me and I bought a nice fresh piece home with their instructions on pan searing.

In short:

A few T of EVOO.  Get is nice and hot.  Meanwhile, double coat the fish with the pan searing flour and drop into the oil.  3 minutes on each side and done. 

Welp, mine wouldn't hold its shape and let's just say by the time I got done it resembled scrambled eggs somewhat.  Fishy scrambled eggs.  Sigh.

Tasted great though.

(NUMBER TWO in 2010)

Monday, January 18, 2010

Curry Chicken Casserole

Here is the first meal I made by using the new apps I have on my iPod Touch!

I downloaded a ton of free apps last week.  One of them was the McCormick's recipe finder.  What a stroke of genius this is!  It's a database directly on your Touch  - in other words, you don't need to be hooked into the internet to use it. 

I also downloaded Epicurious to my Touch, but, to use that app you have to be near wifi.  Not a big deal, because once you have the recipe on the screen it's there and then you can go to the grocery store, but, the McCormick's database is a lot handier because if you are walking around the store, utterly stumped, you can look up a recipe (browse OR search) and then you have the handy-dandy shopping list in your pocket!

Here is the recipe (NUMBER ONE in 2010)

1 T vegetable oil (I used olive oil and just poured into the large frying pan what I felt was appropriate)
1 lb boneless chicken breast, cut into 3/4 inch strips
1 medium onion, chopped (mine was kind of big)
1c sliced carrots
1 c chicken broth (I ended up using the whole can)
1/4 c flour
2 t curry powder (MCCORMICK, since this is their recipe)
1/2 t salt (didn't use, as the chicken broth has plenty)
1 medium Golden Delicious apple (I used Granny Smith)
1/2 c frozen peas
1/2 light cream OR coconut milk (I used coconut milk).

1.  Preheat oven to 425.  Heat oil in large skillet on medium-high heat.  Add chicken, onion and carrots, cook and stir for 5 minutes or so.

2.  Mix flour with curry powder and salt, add in chicken broth and whisk.  Add to skillet, bring to a boil.  Stir in apple.  Reduce heat to medium, cook and stir two minutes until sauce is thick.  This is where I added the rest of the broth, because it cooked down too far for me.  Stir in peas and cream/coconut milk.

3.  The recipe called for either a 9 inch deep-dish pie dish, or, a two quart casserole.  I think I had too many ingredients (I tend to just kind of eyeball things, or throw in more than needed) and I ended up using a 13x9 inch cake pan.  Anyway, pour the mixture into your container!

4.  It said to top with the pie crust.  Well, I had a much bigger container than it called for, so, I draped both pie crusts over the 13x9 inch cake pan and actually they both fit pretty well - one on each end.  By the time it cooked you could not tell there were two of them.  It did call for slitting the top, I forgot.  Oops.

5.  Bake 20-25 minutes or until crust is golden brown.  Mine was in a few minutes longer, but it was fine. 

Enjoy!
Related Posts with Thumbnails